Saturday, December 31, 2011

The little lamb

Surprise!! Another post from me in less than a day!! I had decided that no matter what, I was going to get some crafting time squeezed in this week.  Luckily, the girls were playing outside most of the afternoon and I managed to get several scrapbook pages finished.

As a Stampin' UP demo, I almost always use SU product on my creations, but I have only been a demo for a little less than a year and a scrapbooker for almost 13 years.  Needless to say, there is a lot of other goodies in my stash that are non SU.  Today's page uses a bit of my stash goodies and more of the lovely ribbon from the wonderful Sherry.  I apologize for the slightly crooked picture.

These pictures are several years old and were from my girls' years at daycare.  We brought one of my parents' lambs to the center to show the children.  Since the playground was fenced in, I thought the lamb could run around and the children would be able to see it in action. Well...the kids thought it would be a much better idea to carry the lamb around instead!  My oldest DD kept a close eye on things to make sure no one was hurting her little buddy!


The base and DP are from my stash.  The letters were cut w/ my cricut using pacific point cardstock.  When I finished the layout, the lower left corner was a little empty so I made a punch art sheep to finish it off.  Pretty basic, but I really like the way it turned out.

Page Recipe: Cardstock- whisper white, pacific point, basic black, Ink-baja breeze (to shade the edges of the sheep), white Signo gel pen (for the sheep's eyes), Accessories-large scallop circle punch, 5 petal flower punch

I hope everyone has a happy new year full of health, happiness, and plenty of crafting time!!

a scrapbook page

I had grand plans of making lots of scrapbook pages during my break, but of course, there are always many other things that demand my time as well. For some reason, my family thinks they need meals, clean clothes, and various other frivolous things! But I did manage to squeeze in some scrapping time and completed a few pages.


This page uses lots of retired things, but the product is not quite as old as the picture, so I think I'm still ok ; )

Although it's hard to see, I stamped the butterflies from Sprinkles to break up some of the 'white space' on the base.  And don't adjust your screens or rub your eyes...yes, you are seeing actual stitching on this page!! I broke out one of my piercing patterns and poked the holes before using white bakers twine to cross stitch the page. I love the texture it added to my page, but I'm being completely honest when I admit that I probably won't use this technique too often! I'm generally pretty CAS when I'm paper crafting.
The title and center of my flowers are some chipboard stickers from my stash and that beautiful pink ribbon is from my blogging friend, Sherry (Button Junkie). I won a selection of her hand dyed ribbon as blog candy and loved this fun color with the paper. You really should check out the beautiful colors she makes!

I'm hoping that the next few days will allow me so extra crafting time so I can get a few cards made and make an attempt to catch up on scrapbooking! Wish me luck!! Maybe that can be a new year's resolution...

Page Recipe: Cardstock-Tea Party DSP (ret), whisper white, Stamp Set-Sprinkles (ret), Inks-wisteria wonder marker, almost amethyst ink (ret), Accessories- white bakers twine, 5 petal flower punch, scallop border punch

Friday, December 30, 2011

Break time!

I always look forward to Christmas break! After the busyness of Christmas, I get a whole week to wind down, clean up, and of course, create! The first part of my week was spent doing laundry, cleaning out my closet, and trying to contain the new toys (sheesh...let me know if you can accomplish this one!). I even went through my paper crafting goodies and did a little reorganizing.  With the help of some handy little zip baggies, my scraps container is a little less overwhelming! I even used some of them to finish an album I had started over a year ago! As I was reorganizing, I came across a crafting kit I bought several years ago and I decided to dust it off and use it.  It looks so much nicer completed and on top of my desk than it did in the box! Who would have guessed?!


While the supplies used were part of a kit and not SU, this could so easily be copied using SU products.  The base is an 8X10 canvas.  I used Tombo glue (aka the green bottle glue) to adhere the paper to the canvas.  Everything else was attached with sticky strip. This is my 'go to adhesive for 3D projects (thanks Kelly B for introducing me to this awesomely sticky stuff!).  I also added some pearls to the centers of the silk flowers since they looked a little bare without them!

In my Christmas post, I jokingly commented that as my post was scheduled for 6 am, this would probably be about the time our youngest came running into the bedroom to let us know Santa came.  I was wrong... IT WAS 4:30!!! She informed us that she woke up at 2 am and checked the tree and stockings, but her big sister said it was too early to wake us. So she so considerately waited until 4:30 to tell us. We convinced her to go back to bed until 6:30, then we all went to the living room to open gifts.  Needless to say, a nice little nap occurred later that morning! But even with the early morning wake up call, it was a wonderful day!

Sunday, December 25, 2011

Merry Christmas!

I can't believe that Christmas is here already! Through the magic of modern technology, I am able to post on Christmas day without actually sitting at my computer on Christmas day! My family understands my dedication to my blog and paper crafting, but I think they might draw the line at working on Christmas...  As this is posting, our girls are probably racing into the bedroom to inform us that Santa has visited us and asking if it's too early to wake up (I gave up trying to figure out that logic several years ago...).  Then I'll be dragging my sleepy self into the kitchen to make coffee, so we will actually be awake while opening  presents!

This year has been so amazing!  I began a new adventure by becoming a demonstrator with Stampin' UP! and started this blog.  Along the way, I have met many incredibly talented crafters that have helped me grow and have been a great source of inspiration and support!  Fortunately, my family has embraced this new facet of my life and have supported me through my first year (even if they don't quite 'get' how I can be friends with people I have never physically met).

But enough of the chatter... I have one final Christmas card to share with everyone and I have been saving my most favorite for last! One of my wonderful, fellow blog stalking, slightly warped, but ever crafty and talented friends, Lisa at You Made Me Ink! created a sketch of a snow family portrait on her blog to share with others.  When I made a card using her digi, I ever so subtly suggested that it would look just like our family if only it had a dog to knock the kids down in the snow.  (Shadow does this on a regular basis as the girls are playing in the snow.) Well... Lisa is such a sharp observer that she picked up on my incredibly subtle comment and created a new sketch for me! So here is a snow person version of our family portrait on this year's family Christmas card.  I received many comments on the clever image and had to give all of the credit to my very talented friend!


Don't mind the blue clip; it's holding the card closed for photo purposes. I made a trifold and it didn't want to cooperate for the photo. Hmmm... a lot like my family...
And below is a close up shot of our happy little snow family. Lots of dazzling details for snow and crystal effects to add a little shine!


It even looks like Shadow! Well, except that he's never really took off the kids' heads as they've played in the snow...

I hope that Lisa is having a wonderful Christmas and that next year's Christmas will be even happier for her and her family!! And to all of you who made it to the end of this winded post, Merry Christmas and may your time spent with loved ones be thoroughly enjoyed!

One last picture... This is the nativity scene at our church and it never fails to put everything into perspective as we stop our busyness to remember our greatest gift.


Merry Christmas!

Thursday, December 22, 2011

How many days left????

I don't know about everyone else, but this month has flown by for me!  I had a lot of cards made by the first week of December and I believe it tricked me into thinking I was prepared. WRONG!  There are still a few gifts to finish and a couple of last minute cards to make, plus all of the wrapping, baking, and cleaning...

I did take a little time to check out blogland and found that a card that I had floating in my head would fit well with some challenges!  SUO Challenges is looking for Merry, Happy, or Joyous greetings. My card has Merry right on the front! Top Tip Tuesday wants Anything Christmas and a tip. Here's my tip: when using a large focal image, I cut my strip or ribbon behind the image to save paper.  This is also a great way to use up smaller pieces of cardstock and ribbon. After all, no one will see it behind the focal point!  While this may not be a new tip for more seasoned stampers, it might be something new and less frugal (I refuse to call myself cheap!) stampers have not considered.  This card also fits The Squirrel and the Fox's request for Christmas.  Wow! One card, three challenges!!


This card is using some new 'sneak peek' items from Stampin' UP (demo perk!) and a stamp I have yet to ink up before this card!  

Hope all of your holiday preparations are going well and that you also find a little crafting time in the craziness! Thanks for looking!

Card Recipe: Cardstock-crumb cake, cherry cobbler, soft suede, very vanilla, Stamp Sets-Christmas Postcard, Bells & Boughs, Ink-crumb cake, soft suede, black Stazon, various markers, Accessories-framelits labels, cherry cobbler dazzling details, snow burst embossing folder, blender pen

Sunday, December 18, 2011

A Sassy Little Gift

Each meeting, I  make my club members a little thank you gift that also can give them new ideas about how to use their materials in different ways.  Since this was our last club meeting of 2011, I altered the cover of new 2012 pocket calendars.  The ladies loved having new calendars and liked the idea of giving these as gifts for Christmas.  Because this is such a 'sassy' group of ladies, I just had to pull Sassy Suzie off of the retired shelf and ink her up again.  I also used various 'girl power' sentiments from Favorite Thoughts which is also retired.


Recipe: Cardstock-whisper white, bashful blue, retired DSP, Ink-Stazon black, wild wasabi, various markers, Stamp Sets-Sassy Suzie, Favorite Thoughts, Accessories-basic rhinestones

Saturday, December 17, 2011

Tags Part 2

This is the #2 of the 3 tags I made for a swap.  The third was a 3-D ornament tag that can be viewed here.
I recently bought Winter Post and for the life of me, I don't know why I have waited so long!  I have stamped craft paper for wrapping, made tags, and altered some gift bags using this set. And I haven't even used it for a card yet!!!


For this tag, I stamped the deer first in versamark then chocolate chip ink.  I heat embossed with clear embossing powder to add a little shine.  I think the hardest part of making these tags will be watching others throw them away... I know some of the recipients will save them, and I will have the pleasure of walking in with the prettiest tags!

Recipe: Cardstock-garden green, crumb cake, Ink-chocolate chip, versamark, Stamp Set-Winter Post, Accessories- decorative label punch, early espresso satin quilted ribbon, basic rhinestone (colored w/ Sharpie), hemp twine

Am I Crazy?!,

This time of year is always hectic for me.  I teach 4 different preschool classes and I organize the Christmas program that they perform.  We also have 4 separate parties.  I also help the children at our church with the special children's service on Christmas Eve.  Add to these the normal holiday preparations and it gets quite busy!  This year was the first year I had a pretty good start on my Christmas cards and I came up with the 'brilliant' idea to make all of the tags for our gifts this year!! Am I CRAZY?!  Most of the tags are very simple, after all, I'm sure most of them will be thrown in the trash with the wrapping paper (sniffle...).  However, I put a little more effort into some of them, especially the ones I designed for our team's Christmas tag swap. We were to make a set of three tags.  This is one of the tags I took to the swap...


I love the little accents of glimmer and the stocking punch made this super easy!  Next week, I only have three days of school, so hopefully I will be able to catch up on my blogging!!

Recipe:  Cardstock-wild wasabi, cherry cobbler, whisper white, silver glimmer paper, Ink-wild wasabi, soft suede, Stamp Set- Stitched Stockings, Accessories-snow burst folder, stocking punch, ticket corner punch, cherry cobbler bakers twine

Thursday, December 8, 2011

One Hot Gift Card Holder

With the holidays quickly approaching, I'm always looking for quick and easy gifts to make that can be a gift on their own, or  dress up something I've bought.  This month, my club ladies decided they wanted gift ideas for their projects, so this was a great way to get some of my projects finished while teaching others some fun new techniques.  I found the cutest *FREE* mug template at Mirkwood Designs and while I saw a sample where the mug held a hot cocoa mix packet, I thought using this as a gift card holder would make it a more versatile gift. Just a little stamping to decorate the front of the mug, adding adhesive to the bottom and side  of the flap, then adding a 'tea tag' for effect, was all that it took to make this sweet little gift card holder.


I think this ended up being the favorite project of our club meeting, since we all seem to give gift cards! And in case any of you fellow Starbuckaholics (you know who you are...) are drooling over my gift card, I regret to inform you that this is empty... Isn't that such a sad situation as winter approaches???  Maybe Santa will stash a new one in my stocking this year!  Although since I discovered a local coffee shop in a nearby town, he might surprise me with a gift card from there instead.  After all, I've been pretty good this year.  Well... there was that one time...

Card Recipe: Cardstock-very vanilla, Ink-soft suede, old olive, Stamp Set- Snow Swirled, Too Terrific Tags (ret), Accessories-template, large tag punch, white bakers twine

Sunday, December 4, 2011

3-D Gift Tags

This was another project from our December club meeting.  I honestly can't remember where I first saw the 3-D art, but there were 3-D Christmas trees on a card.  That got the wheels turning in my head (could you see the steam and hear the grinding gears??) and I decided to use the ornament punch to make a fun little gift tag.


I punched 4 ornaments from some retired DSP and folded 3 of them in half, folding in the side I wanted to see.  Then I began attaching the halves together. After this step, I attached the first and last half to the unfolded piece (still with me?).   I don't have a picture of the back, but I used a to/from stamp for the names.  The last step is to pierce a hole near the top and run some linen thread through the hole to make a 'hanger'.  This could also be turned into a completely 3-D ornament by adding two more ornament pieces, folding all six in half, and then attaching the halves together.

Recipe: Cardstock-retired DSP, Accessories- ornament punch, linen thread, paper piercer

Friday, December 2, 2011

Club project-gift ideas

Wow! Feels like forever since I've posted! We had our first snow on the 29th... It was very pretty and best of all, by nightfall, everything was clear again.  I love watching snow fall, but hate shoveling and cleaning off my car, so this was a perfect snowfall for me!


My club ladies wanted some simple gift ideas for this month's club projects.  I received this wonderful post it note holder in a swap at the SU regional from Tamra Needles.


 It inspired me to make a wintery version.  This would be a great gift for co-workers, teachers, or friends. Who couldn't use post it notes?! I am notorious for using tons of them to write notes, jot down ideas, and them post them on my craft table where they are promptly forgotten until I unearth them about a week later... Maybe I need to create a wall mounted post it note organizer!


This is a pretty basic easel design, but if you need detailed instructions, just let me know.  I knew I wanted to use the sweet little girl from Gift Givers for this and hope the club ladies love this as much as I do!

Recipe: Cardstock-wild wasabi, very vanilla, Holly Berry Bouquet DSP, Ink- soft suede, wild wasabi, real red, blender pen, blush blossom & crumb cake markers, Stamp Set-Gift Givers, Accessories, scallop circle punch, dazzling details, mini post it notes

Sunday, November 27, 2011

Waste not, want not...

I recently tried my hand at tinting glimmer paper and when I was done, I had an aqua painter with some marina mist colored water. Rather than clean out the brush, I decided to experiment with a scrap piece of very vanilla cardstock that was on my table.  So not only did I tint glimmer paper, I also water colored a large scrap piece of paper.  After it dried, I was looking at the paper and snowflakes came to mind, so I grabbed my snowflake punch and punched out as many flakes as I could squeeze from the paper.  I thought they turned out pretty cool and couldn't wait to use them on a card. My card today is one of those cards that just came together.  I pulled bits and pieces of ideas from a variety of cards I have seen recently. Of course my water colored snowflakes had to be on this too!


I stamped the trees in versamark then soft suede before stamping on my cardstock.  Then I used clear embossing powder and heat embossed the trees.  A few quick spritzes of vanilla shimmer smooch spritz added the look of a light snowfall and then some stickles to the torn paper snowbanks and trees for the glistening snow.  I would have used my dazzling details, but couldn't locate it. I think it's still in one of my containers from the crop night... Luckily, I still had a little bit of icicle stickles left in a bottle.  After it dried, I noticed the 'snow' under the trees looked more gold than white.  I think it's from the soft suede ink.  We'll just pretend those are the fall leaves that didn't get raked up before the snow!

Card Recipe: Cardstock-whisper white, garden green, marina mist, watercolored paper, Ink-versamark, soft suede, Stamp Set-Lovely as a Tree, Accessories-square lattice folder, vanilla shimmer smooch spritz, clear embossing powder, heat gun, basic rhinestones, non SU snowflake punch

Saturday, November 26, 2011

Tinted Glimmer Paper

A few posts back, I shared a picture of the glimmer paper ornaments I punched out and tinted.  I finally used these to make some Christmas cards. I got the information on tinting the paper and the card design from Debbie, you can see the full directions on her blog, but it's pretty basic.  I punched my ornaments first.  I took re-inkers and squeezed a little ink into a lid, then used the aqua painters and ink to paint the ornaments. You can use your heat gun to set the ink or if you do several, like I did, just put them on paper towel and let them air dry.  This was a little messy and my fingers were inky by the time I was done, but this really is a simple and fun, yet beautiful technique. I was amazed at the amount of shimmer that still came through and after sponging the edges with soft suede, they really took on an antiqued look.  Here is my card.


If you saw the card we made at the crop, this is the same layout, only I used linen thread for the 'hook' and the glimmer ornaments. Be sure to check back on my blog and see the other creative idea that came from my aqua painter and re-inkers!

Card Recipe: Cardstock-garden green, whisper white, glimmer paper, Ink- cherry cobbler & marina mist re-inkers, garden green, soft suede, Stamp Set-Lovely as a Tree, Accessories-ornament punch, linen thread, square lattice folder, top note die

Thursday, November 24, 2011

Happy Thanksgiving

Just a quick post today, as I am elbow deep in the kitchen with desserts! I have made a turkey before and it was really tasty, just not very pretty... Luckily, other members of our families are more than happy to take this job, so I get to focus on one of my other loves, baking!

My Thanksgiving card once again features the artwork of the ever talented Lisa M!  When I saw her free doodle of the turducken (chicken in a duck in a turkey), I just had to laugh! Now, we are a little more traditional here and stick with the good ol' roasted turkey, but this guy(s) made me smile and I had to share them!


Card Recipe: Cardstock-kraft (ret), whisper white, hay from stash box, Ink-pastels on leaves, copics on image, Stamp-leaf from Lovely as a Tree, digi doodle from Lisa, Accessories-chocolate chip grosgrain (ret)

I also wanted to share some pics of the ornaments my girls made for the family ornament exchange we are having tonight.  Each year, my Mom, her sisters, and all of the spouses and offspring get together for Thanksgiving dinner.  We do a Sneaky Santa ornament swap.  My girls decided about 2-3 years ago to make their ornaments instead of buying some.  The aunts went crazy!  It was like watching the Black Friday crowd when there's only 1 item left!!  Here are this year's creations...


I want to wish all of my US followers (and those just peeking in) a very blessed Thanksgiving!  I can sincerely say that this year has been one of my more blessed and happy years.  Our family has remained in decent health, no serious accidents, plenty of food, steady income, and the love of many family members and friends. A special thank you to all of the wonderful friends I have met in Blogland for leaving such fabulous comments on my blog!  You have made me laugh and smile when I least expected it and I am truly blessed to have met all of you!

Wednesday, November 23, 2011

Blog Candy

I just found this blog, thanks to my cyber buddy, Lisa and wanted to pass this info on!  There are a lot of awesome altered projects posted  at The Craft Barn and they are offering blog candy.  The deadline is November 25th, so if you want a chance to win all of this, you better hurry!


Tuesday, November 22, 2011

The only card I made at the crop...

If you have seen my last two posts, you are already aware that I organized a Crop night for our daycare and preschool.  While I had a wonderful time and taught two projects, I accomplished next to nothing of my own! I had colored some images about a month ago and brought them along with the hopes of getting them turned into Christmas cards by the end of the night.  I actually finished about 5 of them...  But I did enjoy checking out what everyone else was making and visiting with friends.

Here is a picture of the only project I worked on!


Card Recipe:Cardstock- whisper white, bashful blue, DP from stash, Ink- Stazon black, Early Espresso & Blush Blossom markers, copics, Stamp- Non SU, Accessories-dazzling details, snow burst folder, clear trim tinsel (ret.)

Sunday, November 20, 2011

Crop Project #2

Friday night was our daycare and preschool's fundraiser Crop night.  This is the second project that I taught.


Recognize the branches of the tree?  It's the pine tree from Lovely as a Tree turned sideways and stamped twice! This card was a CASE of Debbie's card, I just changed the papers a bit.  I also did a card like this using the tinted glimmer paper and will show that picture soon.  The ladies really enjoyed this card!  Most of the people attending were scrapbookers and they loved trying something new.

Card Recipe:Cardstock-whisper white, garden green, cherry cobbler, marina mist, Stamp Sets-Lovely as a Tree, Word Play (sentiment), Ink-soft suede, garden green, cherry cobbler, Accessories- ornament punch, snowburst folder, square lattice folder, top note die, cherry cobbler bakers twine

Saturday, November 19, 2011

Crop Night Project #1

Wow!  I had every intention of actually making something and posting here on Thursday, but my week has been super crazy!  Our daycare and preschool celebrated 25 years of operation this year and we held a special fundraising crop night as part of our celebration.  I was in charge of organizing this event and since it was my first time hosting a crop, it was a bit overwhelming!  But, everything went well, pages and cards were created, prizes were won and food was consumed! It was wonderful to be surrounded by ladies with various skill levels and styles.  I have to admit, I mingled a lot more than I created, but I did manage to get a few more Christmas cards finished.  At the end of the night, I was packing up my stuff and saw my camera case...DUH! I completely forgot to take any pictures...

I taught two different projects at the crop and this is my first...


While this was pretty simple, everyone seemed to enjoy it.  That may have had something to do with M&Ms being involved.  If you are looking at the picture and thinking "M&Ms?", no you're not seeing things. My sample had skittles because that is all I had in the house when I made my sample.  At the crop they used red and green M&Ms.  We used the markers to color the stamp so there could be various colors, punched, and then stapled the tag to the bag.  I will give a bit of advice; the ease of stapling is directly related to the type of stapler you use.  My itty bitty Dollar Tree stapler worked much better than my heavy duty Swingline. Be sure to check back tomorrow for part 2!

Recipe: Cardstock-whisper white, Stamp Set-From Santa, Ink (markers)-poppy parade, pear pizzazz, crumb cake, Accessories- 2 3/8 scallop circle punch, 1x8 cellophane bags

Wednesday, November 16, 2011

I Love Care Packages!

Normally I am not thrilled to go to the mailbox.  It's usually filled with junk mail or even worse...BILLS!!! But this month has been much nicer than usual!  I actually won blog candy from the ever fabulous, Button Junkie herself, Ms. Sherry! She has the most beautiful dyed wrinkled ribbon and we were supposed to comment and tell her our favorite color.  I just couldn't choose one and told her I loved all of them!  This is what I received in the mail...


along with this super sweet card!


Then today I checked my mailbox and there was a box of really yummy taffy from my favorite candy store in Gatlinburg!  My BFF and her DH went to Gatlinburg to celebrate their anniversary and she bought and sent  me a box! How sweet was that?!  But that's not what really made this package special.  She is VERY new to cardmaking. ( I roped her into attending one of my classes this spring and she was hooked!) The most wonderful part (not that I don't really, really love the taffy...) was this awesome card!!


She even decorated the inside!!! Unfortunately, she mentioned the fact that it would be really nice of me to share the taffy with my DH and two girls... Hmmm....one piece each is still sharing right?!  Actually the box is rather large and I'm sure I will not have a problem with them taking more than a few  pieces!

Hope you have a wonderful evening and I hope to be able to post some of my creations before the weekend!


Friday, November 11, 2011

Happy Veterans Day!

Happy Veterans Day and a very special 'Thank You' to all veterans for your service to our country! Veterans Day has always been one of those special days for me.  While I'm not a 'military brat', my Dad served in the Army during the Korean War.  This was well before I was even a 'glint in his eye', but he taught all of us to show honor and  respect for our country, the flag, and all military who protected us.  There are several members of our family who are veterans and many who are actively serving, so this continues to be important to our family.  My Dad always looks forward to his phone call from my girls wishing him a "Happy Veterans Day!" Today a friend shared on Facebook that there was a free digi of Army Bear in honor of Veterans Day here.  So of course I had to get it and made a card for my favorite veteran!


This is the second attempt at coloring the image.  I really didn't like the way the browns blended, or should I say DIDN'T blend,  on the first one. I also felt like the ribbon needed a bow or something, but thought that might be to 'pretty' for this card.

And here is a picture of my most favorite veteran in the world!  That's my DD with him.  This was taken about 2 years ago at her 1st Communion.


Card Recipe: Cardstock-brilliant blue (ret), real red, whisper white, Inks-early espresso, crumb cake, pear pizzazz, lucky limeade, blush blossom, poppy parade (all markers) and a few copics, Accessories-whisper white grosgrain ribbon, stars (non su)

Thursday, November 10, 2011

Return of the mojo, sort of...

For the past week, I have felt a little 'blah' about creating.  I would see all of these inspiring creations from others and then sit at my table and think 'hmmm.....' I have created a few things for some upcoming projects that I didn't want to post yet, but other than the things I HAD to make, there hasn't been much creativity flowing.  So tonight I decided, no matter what, I was going to make something!  I pulled out my silver glimmer paper, punched a few ornaments, and got everything ready to color them.  If you have yet to be exposed to this technique, I saw this for the first time at Debbie's Designs.  She is so nice, super talented and always has the best tutorials! Anyway, as I sat there playing with my aqua painter (first time!) and the ink, things just sort of clicked.  I was having fun, not worrying about the end product (which was AWESOME!) and just experimented with the ink and paper.  So as my ornaments were drying, I starting thinking about this super cute image my super talented, always funny, friend, Lisa at You Made Me Ink, had posted a looong time ago that I had printed and colored.  I was waiting for just the right inspiration to strike so I could use this and I came up with this...

It's a little hard to appreciate from the picture, but the image of the 'not so perfect' snow family has been given a few little touches after the coloring.  I used dazzling details on the ground and accented the hat, Mother's scarf, and the instigator's earmuffs with crystal effects.  I really love this image and had to remember the many, 'not so perfect,' family pictures I have been a part of over the years.  It also seemed so fitting since there are four in our family (five if you count the dog).  Maybe I'll have to talk Lisa into commissioning a special image with Shadow knocking both of the kids down.  He is notorious for this!

 Because of the coloring, and added touches to this card, not to mention the glimmer snowflakes that I punched (glitter everywhere!) I decided this qualified for the challenge at Hand Stamped Sentiments.  They are looking for 'over the top' cards.  You know, the ones that you make and love, but say "Never again..."  Not saying I won't ever do this again, but I sure wouldn't want to make 20 or 30 of these!
 

Just in case you wanted to see my tinted ornaments...
I'm hoping to be able to do something with these over the weekend. Wish me luck!


Card Recipe: Cardstock- pear pizzazz, whisper white, poppy parade DSP (in colors stack), glimmer paper, Ink- assorted SU markers, Stamp Set-image from Lisa M, Accessories-pear pizzazz seam binding, dazzling details, crystal effects, non SU snowflake punch


Ornaments: Silver Glimmer paper, cherry cobbler  and marina mist reinkers, aqua painter, ornament punch

Fall Theme Swaps

As promised, here are a few more swaps that I received.  Although many of the swappers had Christmas as their theme, some, like me, created fall cards.  I thought I would share the fall cards today.


The card on the left is by Alicia Tomicich-Wiley and the one on the right is from Sue Erickson.


The top card is from Debbie Payne and the bottom card was made by Maureen Evers.

Nothing says fall like beautiful leaves and all four of these ladies used them beautifully on their cards!  it is amazing how much more lovely these are when you can hold them in your hands!

Tuesday, November 8, 2011

Regional Swaps

I was so impressed with all of the inspiration at the SU Regional Event.  The swap boards were just amazing and I took tons of pictures to help me remember what I want to try! We created two make and take cards and I also swapped with 31 incredibly talented ladies and wanted to share a few of my favorites.  The first picture is my make and take cards.  My mojo was not with me and I made a few goofs on them (punching in the wrong spot for one). At home, I could have found a way to cover it, but by the time I got home, I was too wiped out to want to worry about it.  I will fix it before sending it to someone!


The next picture shows the swaps that some of the ladies from our team shared.  Tiffany, and Chas created these sparkly Christmas cards. I love the glittery snowflake Chas used on her card and Tiffany's Santa card is just so much fun!


These were created by Denise and Shelly, who are also members of our team.  I am so fortunate to be with these ladies on a monthly basis!


Sunday, November 6, 2011

A start on Christmas cards

Hello, my name is Margaret and I am a procrastinator...but I can change, if I have to, I guess...
They say that the first step to overcoming a bad habit is to admit that you have one. While I know that my procrastinating can sometimes cause added stress and the occasional 'dropping the ball', I have to be honest and say that some of my best work comes when under pressure. While working my way through college, I loved my job at Big Lots (an eclectic discount retail chain).  Each day when I came in, it was a different area of the store, a special task, or customer service that awaited me.  I loved the challenge of adjusting to my new duties and although most of my coworkers thought I was crazy, I loved difficult customers. Not nasty, hateful customers, but people that came in the door knowing that they probably weren't going to be pleased. I loved the look of pure shock and awe when I would help them with their concerns and offer suggestions they hadn't considered.  This was not a job I could plan for; it was fly by the seat of my pants and I LOVED it.

If you're still with me, you are probably wondering just what this has to do with paper crafting. My point, and I do have one, is that while I do have to keep my procrastinating in check in most areas, there are other times that the impulsive response is the best.  This is how I create my Christmas cards.  I will look through idea books, surf online, and browse the craft stores, but in the end some of my best cards come at the last minute trying to get just a few more greetings in the mail before the big day.  I like to think that at these times I'm not nitpicking my creativity and it thanks me by giving it's best efforts.

I wasn't planning on making a Christmas card this week, but then I saw the sketch at Sketches By Carly and thought about the stamp set Gift Givers, which hasn't seen much ink yet, a card began to form.  It is not at all like most Christmas cards I create, but I really love how it turned out! I even managed to use some Spice Cake DSP on this!!


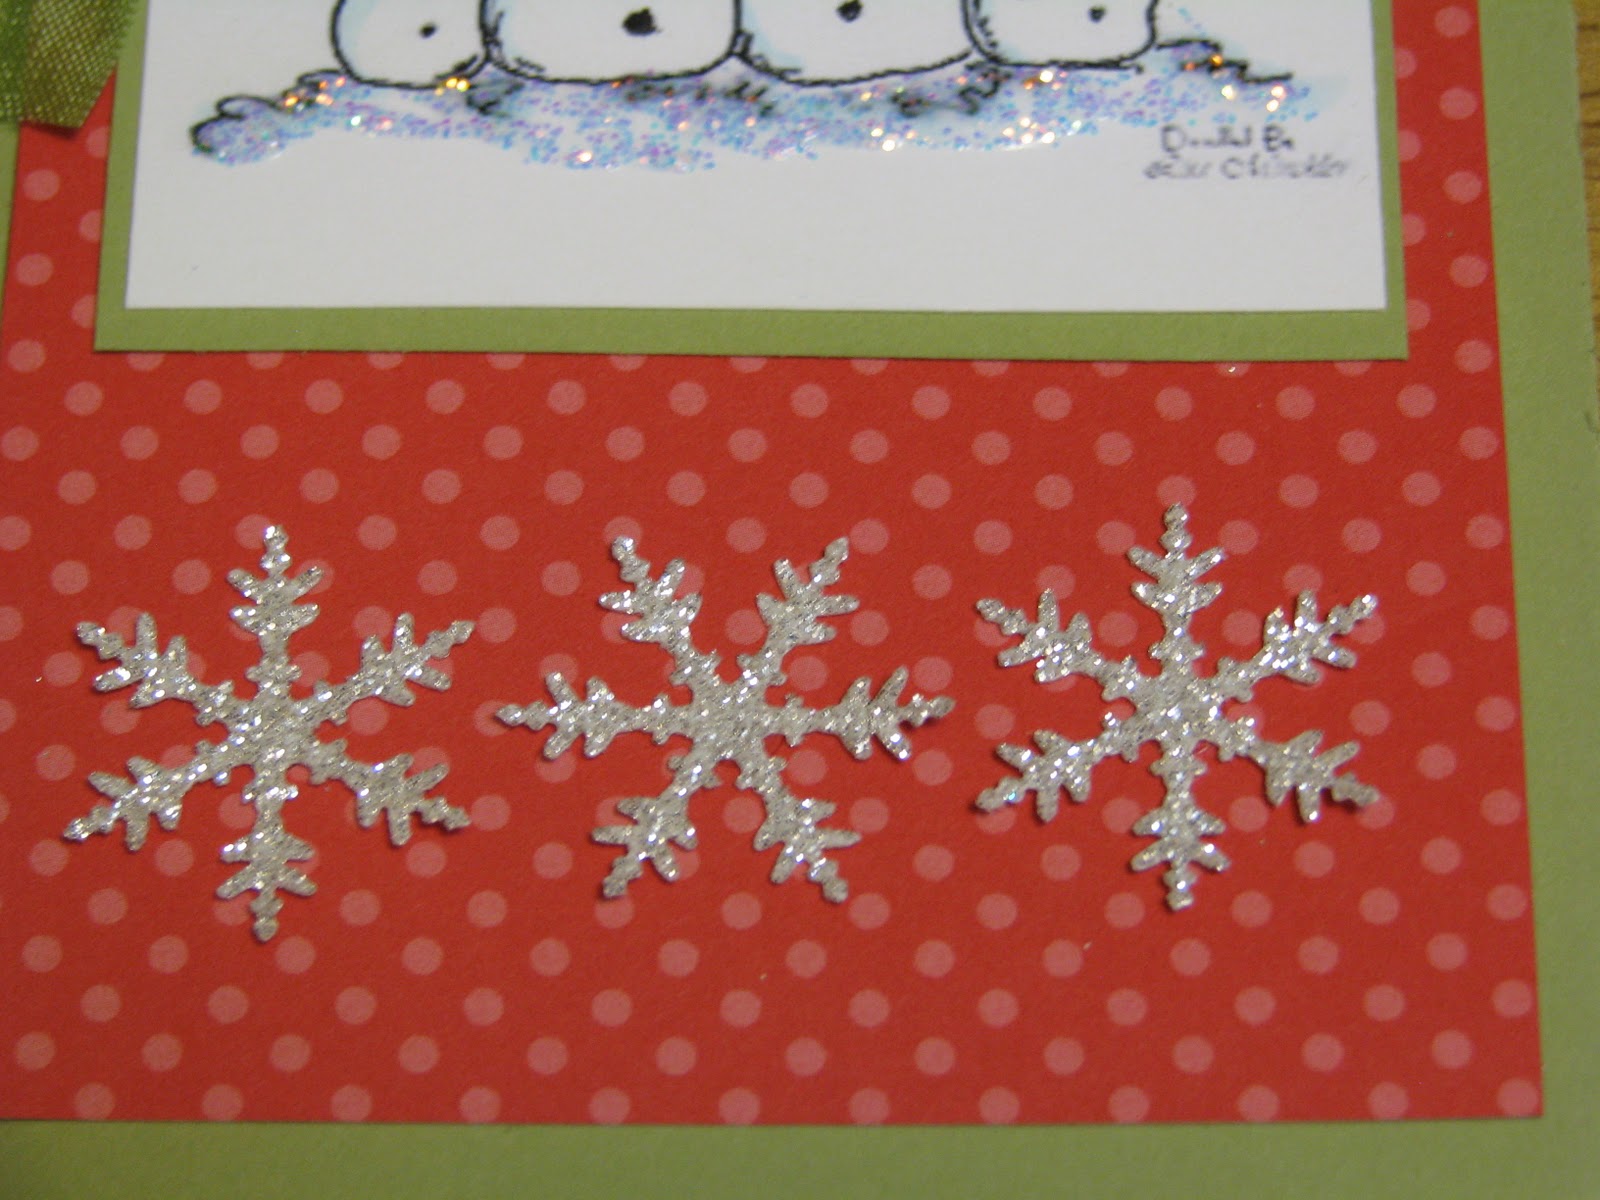
I really love that SU started carrying Dazzling Details.  I love this stuff for snow! I also have recently started an addiction to Vanilla Shimmer Smooch Spritz. Almost all of my 'girly' cards get a few shots of this awesome stuff!

Card Recipe: Cardstock- very vanilla, pool party, Spice Cake DSP, Ink-basic gray, pool party, island indigo, blush blossom, Stamp Sets-Gift Givers, Snow Swirled, Tags So Much (ret.-colored only sentiment), Accessories-vanilla shimmer smooch spritz, dazzling details, very vanilla seam binding, scallop circle punch, 2 3/8 scallop circle punch

I also wanted to share a picture from the Louisville Regional Event.  Several ladies from our team, The Crafty SisTAHs, went together.  This is such a wonderful group of ladies and we had a great day together. I'm in the back row wearing pink!


I'll share some pics of swaps in my next post!!


Wednesday, November 2, 2011

Just a Note

This is the last of my four cards from my scraps box. Over the summer,  I made a set of note cards for a good friend of mine from church, who is also the organist, for her birthday.  I had just one little square left of the DP and thought this would be enough to make a card for my oldest DD's choir teacher.  We started a tradition years ago of giving their teachers a thank you note on Thanksgiving and she wanted me to use this paper for her card.


The card base is a very old one that I received as a thank you gift for hosting a Stampin' UP party years ago... Who knew?!  

Card Recipe: Cardstock-naturals ivory, soft suede, non SU DP, Ink-Black Stazon, Stamp Set- non SU sentiment, Accessories-chocolate chip satin ribbon

Monday, October 31, 2011

Do you know what this is??

Anyone know what is special about this post? Anyone? Anyone? (sorry, Ferris Bueller flashback) This is my 100th blog post!!  In February, my upline convinced me to start a blog and my first thought was 'who is going to look at this?' and the second thought was 'when will I find time to do this?'  Little did I know then, how many wonderful friends I would make throughout the world simply by posting pictures of my creations and sharing a little of myself! Most of my followers know that I am a blogging junkie and frequently stalk their blogs for new inspirations and frequently a laugh or two. And who would have thought I would have 100 things to post about in 8 short months!
But enough of the mushy background, on to today's post.  This is another of my scrap cards that I made over the weekend.  The image was one that I made at one of our team meetings.  We were learning a new technique for adding interest to solid stamp areas using a ziplock baggie to make swirls or swipes.  I kept meaning to do something with this and finally decided over the weekend that I would use it.


Card Recipe: Cardstock-whisper white, so saffron, pear pizzazz, Ink-pear pizzazz, basic black, rose red, Stamp Set-Awash with Flowers, Accessories-pear pizzazz seam binding, snow burst folder

I also wanted to share a picture of my oldest DD's warped  humor.  She is a very 'hands on' learner and still loves building and creating with Legos.  For Christmas, she received the Hogwarts Lego set and is constantly changing and adding to the original structure.  As I was working on cards the other day, she walks up and says "Look.  They're getting ready for their Halloween party." I glanced, not really paying attention until I noticed Harry. Then I had to laugh.  Here is her Hogwarts Halloween Line Up...

Hermione is the knight and Dumbledor is Squidward (from Spongebob). I'm not sure who the others are.  (They don't really look like the characters in the movie...)  I thought this was pretty cute! Glad my  almost teenager isn't completely growing up!  Happy Halloween!!

Saturday, October 29, 2011

Card Swap

As this post is hitting my blog, I will be living it up in Louisville, KY for the Stampin' UP regional event!! I am carpooling with several of my Crafty SisTAHS and we are going to have a great time!  Since this is my first SU event, I'm not quite sure what to expect, but I know I'll have lots of fun (after all, it's a day full of stamping goodness, how can  it be anything but fun?!).  My upline told all of us to be sure to make card fronts for swapping because there are so many wonderful ideas out there and it's a fun way to meet people and trade talents.  So my 32 card fronts are with me and I hope to have some fabulous new ones to share when I come home!  Here is my card front...


 I wanted to have the sentiment backed by the DSP, but didn't want to be limited to fitting it in a smaller circle, so I temporarily stuck a strip of very vanilla (not sure what size, I used scraps) to a 2" strip of DSP, then I punched the circle and had a perfect area for stamping my sentiment.  I also distressed the edges of everything using soft suede ink and a sponge dauber.

Card Recipe: Cardstock-very vanilla, pear pizzazz, Spice Cake DSP, Ink-soft suede, pastels, Stamp Set-Faith in Nature, Accessories-square lattice embossing folder, 1 3/8 circle punch, linen thread